

401
Digital Terrain Analysis
3. The Oblique Plot will enable you to take a section of the DEM and
examine it in oblique perspective view. After clicking on Oblique
Plot, double-click on a section of the DEM and then drag the mouse
to another section. The red box that you are drawing by clicking
and dragging represents the area of the DEM that will be shown in
perspective view. Double-click again when you’ve set up the red box for
the area you want.
Important note: Be sure not to select too large an area. MICRODEM may
not be able to handle a section that’s too big.
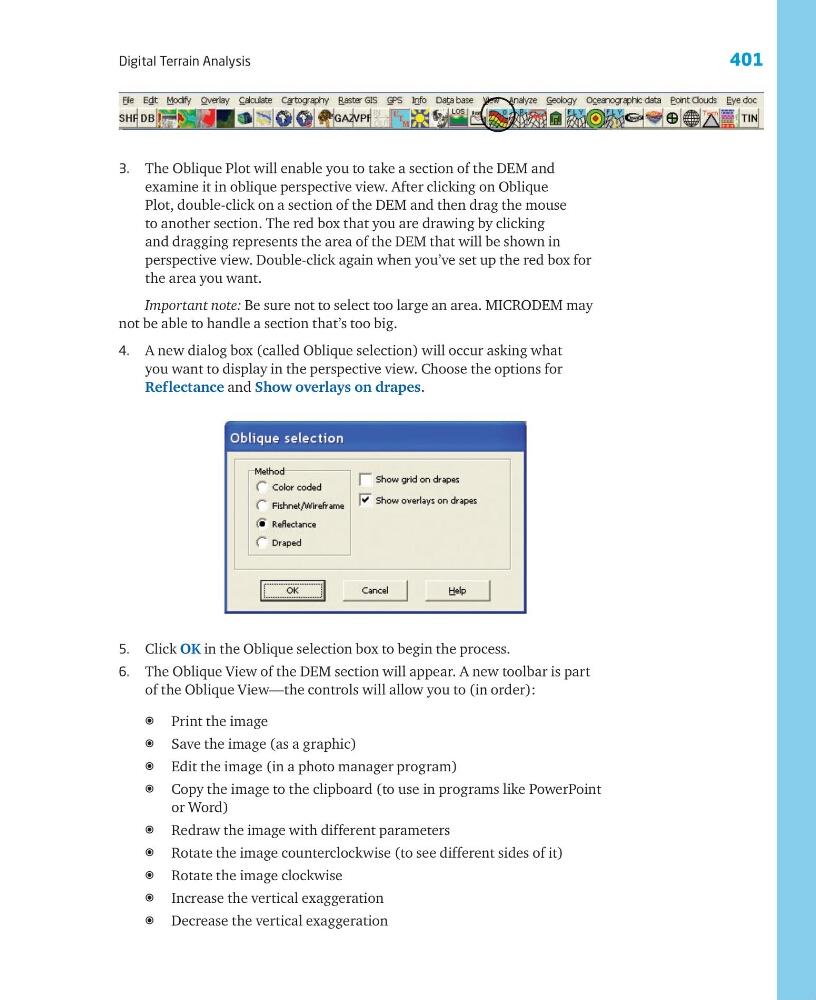
4. A new dialog box (called Oblique selection) will occur asking what
you want to display in the perspective view. Choose the options for
Reflectance and Show overlays on drapes.
5. Click OK in the Oblique selection box to begin the process.
6. The Oblique View of the DEM section will appear. A new toolbar is part
of the Oblique View—the controls will allow you to (in order):
a Print the image
a Save the image (as a graphic)
a Edit the image (in a photo manager program)
a Copy the image to the clipboard (to use in programs like PowerPoint
or Word)
a Redraw the image with different parameters
a Rotate the image counterclockwise (to see different sides of it)
a Rotate the image clockwise
a Increase the vertical exaggeration
a Decrease the vertical exaggeration
Digital Terrain Analysis
3. The Oblique Plot will enable you to take a section of the DEM and
examine it in oblique perspective view. After clicking on Oblique
Plot, double-click on a section of the DEM and then drag the mouse
to another section. The red box that you are drawing by clicking
and dragging represents the area of the DEM that will be shown in
perspective view. Double-click again when you’ve set up the red box for
the area you want.
Important note: Be sure not to select too large an area. MICRODEM may
not be able to handle a section that’s too big.
4. A new dialog box (called Oblique selection) will occur asking what
you want to display in the perspective view. Choose the options for
Reflectance and Show overlays on drapes.
5. Click OK in the Oblique selection box to begin the process.
6. The Oblique View of the DEM section will appear. A new toolbar is part
of the Oblique View—the controls will allow you to (in order):
a Print the image
a Save the image (as a graphic)
a Edit the image (in a photo manager program)
a Copy the image to the clipboard (to use in programs like PowerPoint
or Word)
a Redraw the image with different parameters
a Rotate the image counterclockwise (to see different sides of it)
a Rotate the image clockwise
a Increase the vertical exaggeration
a Decrease the vertical exaggeration