

219
GIS Layouts: ArcGIS Version
Choose the states layer for this map and select one column. Click Next
to advance to the second menu.
4. The second menu will allow you to give the legend a name—give it
something more appropriate besides “legend.” You can also adjust the
color, size, font, and justification of the legend itself. Once you’ve set
these values, click Next to advance to the third menu.
5. The third menu will allow you to adjust the color, thickness, and
appearance of the legend’s border, background, and drop-shadow
effects. Examine various options for the legend’s appearance and, when
ready, click Next to advance to the fourth menu.
6. The fourth menu will allow you to alter the symbol patch of the legend
items (in this case, the states layer). When ready, click Next to advance
to the fifth menu.
7. The fifth and final menu will allow you to adjust the appearance and
spacing of items in the legend itself. When you’re satisfied with how the
legend will look, click Finish. The legend will then be added to the layout.
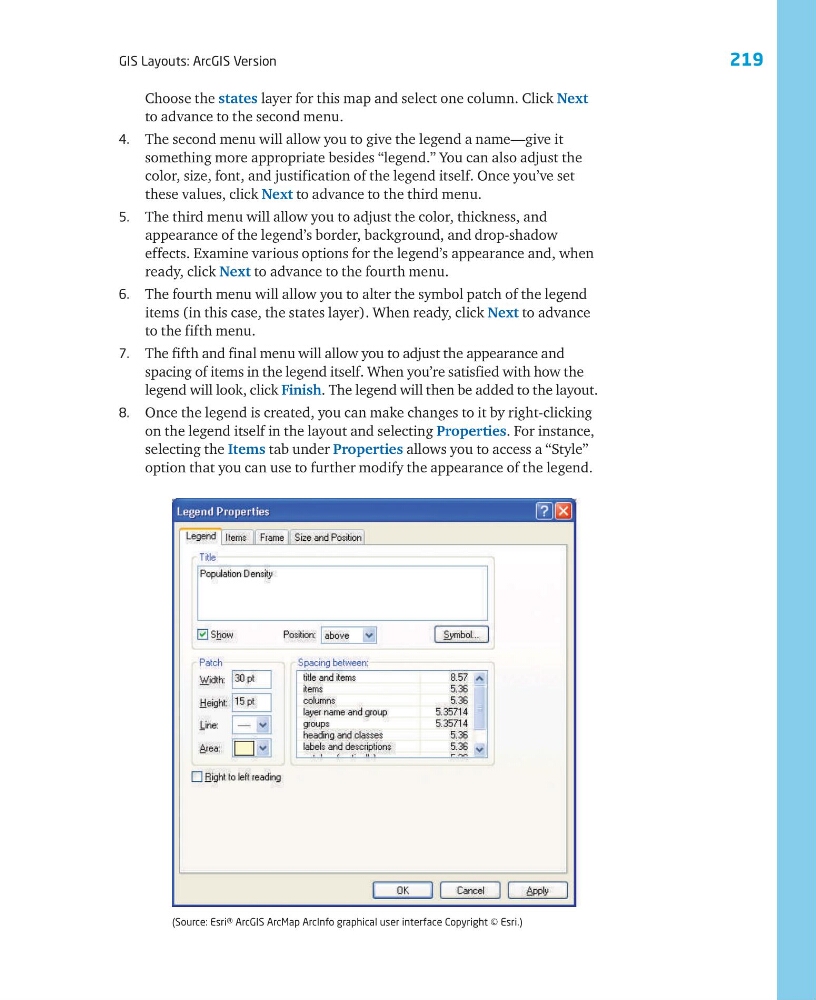
8. Once the legend is created, you can make changes to it by right-clicking
on the legend itself in the layout and selecting Properties. For instance,
selecting the Items tab under Properties allows you to access a “Style”
option that you can use to further modify the appearance of the legend.
(Source: Esri® ArcGIS ArcMap ArcInfo graphical user interface Copyright © Esri.)
GIS Layouts: ArcGIS Version
Choose the states layer for this map and select one column. Click Next
to advance to the second menu.
4. The second menu will allow you to give the legend a name—give it
something more appropriate besides “legend.” You can also adjust the
color, size, font, and justification of the legend itself. Once you’ve set
these values, click Next to advance to the third menu.
5. The third menu will allow you to adjust the color, thickness, and
appearance of the legend’s border, background, and drop-shadow
effects. Examine various options for the legend’s appearance and, when
ready, click Next to advance to the fourth menu.
6. The fourth menu will allow you to alter the symbol patch of the legend
items (in this case, the states layer). When ready, click Next to advance
to the fifth menu.
7. The fifth and final menu will allow you to adjust the appearance and
spacing of items in the legend itself. When you’re satisfied with how the
legend will look, click Finish. The legend will then be added to the layout.
8. Once the legend is created, you can make changes to it by right-clicking
on the legend itself in the layout and selecting Properties. For instance,
selecting the Items tab under Properties allows you to access a “Style”
option that you can use to further modify the appearance of the legend.
(Source: Esri® ArcGIS ArcMap ArcInfo graphical user interface Copyright © Esri.)