

139
GIS Introduction: ArcGIS Version
5.5 Navigating the View
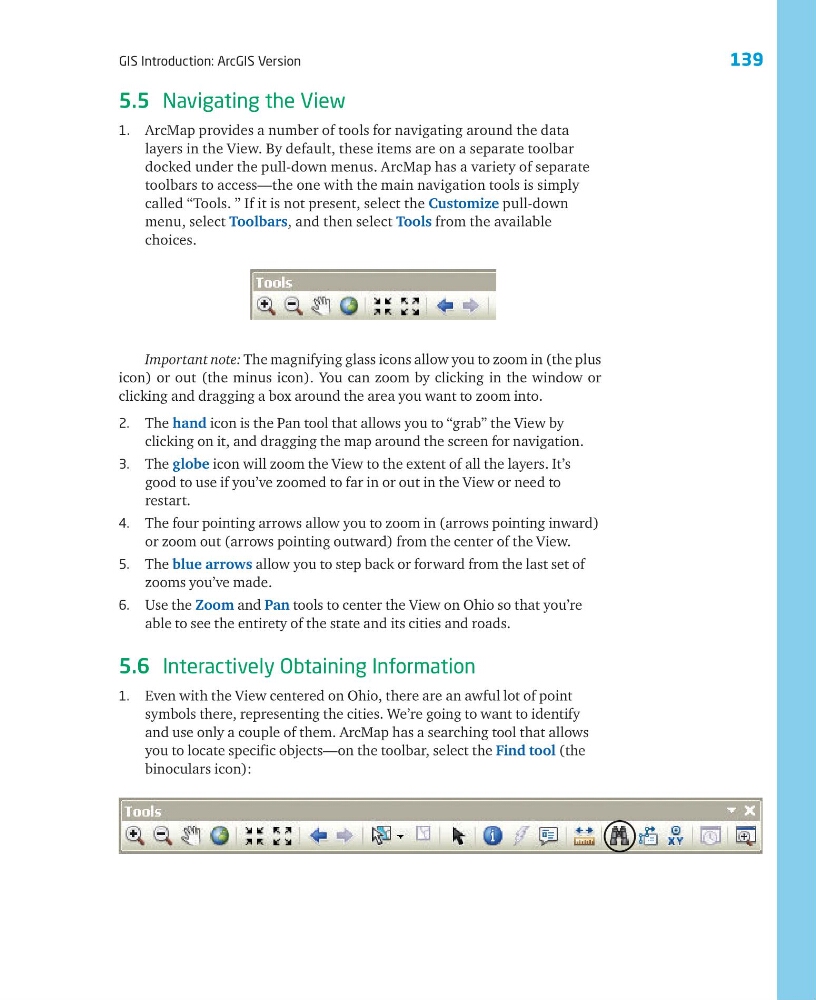
1. ArcMap provides a number of tools for navigating around the data
layers in the View. By default, these items are on a separate toolbar
docked under the pull-down menus. ArcMap has a variety of separate
toolbars to access—the one with the main navigation tools is simply
called “Tools. ” If it is not present, select the Customize pull-down
menu, select Toolbars, and then select Tools from the available
choices.
Important note: The magnifying glass icons allow you to zoom in (the plus
icon) or out (the minus icon). You can zoom by clicking in the window or
clicking and dragging a box around the area you want to zoom into.
2. The hand icon is the Pan tool that allows you to “grab” the View by
clicking on it, and dragging the map around the screen for navigation.
3. The globe icon will zoom the View to the extent of all the layers. It’s
good to use if you’ve zoomed to far in or out in the View or need to
restart.
4. The four pointing arrows allow you to zoom in (arrows pointing inward)
or zoom out (arrows pointing outward) from the center of the View.
5. The blue arrows allow you to step back or forward from the last set of
zooms you’ve made.
6. Use the Zoom and Pan tools to center the View on Ohio so that you’re
able to see the entirety of the state and its cities and roads.
5.6 Interactively Obtaining Information
1. Even with the View centered on Ohio, there are an awful lot of point
symbols there, representing the cities. We’re going to want to identify
and use only a couple of them. ArcMap has a searching tool that allows
you to locate specific objects—on the toolbar, select the Find tool (the
binoculars icon):
GIS Introduction: ArcGIS Version
5.5 Navigating the View
1. ArcMap provides a number of tools for navigating around the data
layers in the View. By default, these items are on a separate toolbar
docked under the pull-down menus. ArcMap has a variety of separate
toolbars to access—the one with the main navigation tools is simply
called “Tools. ” If it is not present, select the Customize pull-down
menu, select Toolbars, and then select Tools from the available
choices.
Important note: The magnifying glass icons allow you to zoom in (the plus
icon) or out (the minus icon). You can zoom by clicking in the window or
clicking and dragging a box around the area you want to zoom into.
2. The hand icon is the Pan tool that allows you to “grab” the View by
clicking on it, and dragging the map around the screen for navigation.
3. The globe icon will zoom the View to the extent of all the layers. It’s
good to use if you’ve zoomed to far in or out in the View or need to
restart.
4. The four pointing arrows allow you to zoom in (arrows pointing inward)
or zoom out (arrows pointing outward) from the center of the View.
5. The blue arrows allow you to step back or forward from the last set of
zooms you’ve made.
6. Use the Zoom and Pan tools to center the View on Ohio so that you’re
able to see the entirety of the state and its cities and roads.
5.6 Interactively Obtaining Information
1. Even with the View centered on Ohio, there are an awful lot of point
symbols there, representing the cities. We’re going to want to identify
and use only a couple of them. ArcMap has a searching tool that allows
you to locate specific objects—on the toolbar, select the Find tool (the
binoculars icon):