

70
Chapter 3 Getting Your Data to Match the Map
9. From the Mashup Viewer’s Virtual Earth Background pull-down menu,
select the Hybrid option.
Question 3.6 How does the map match up with the roads leading in and
out of campus? Are there any locations where the roads don’t match?
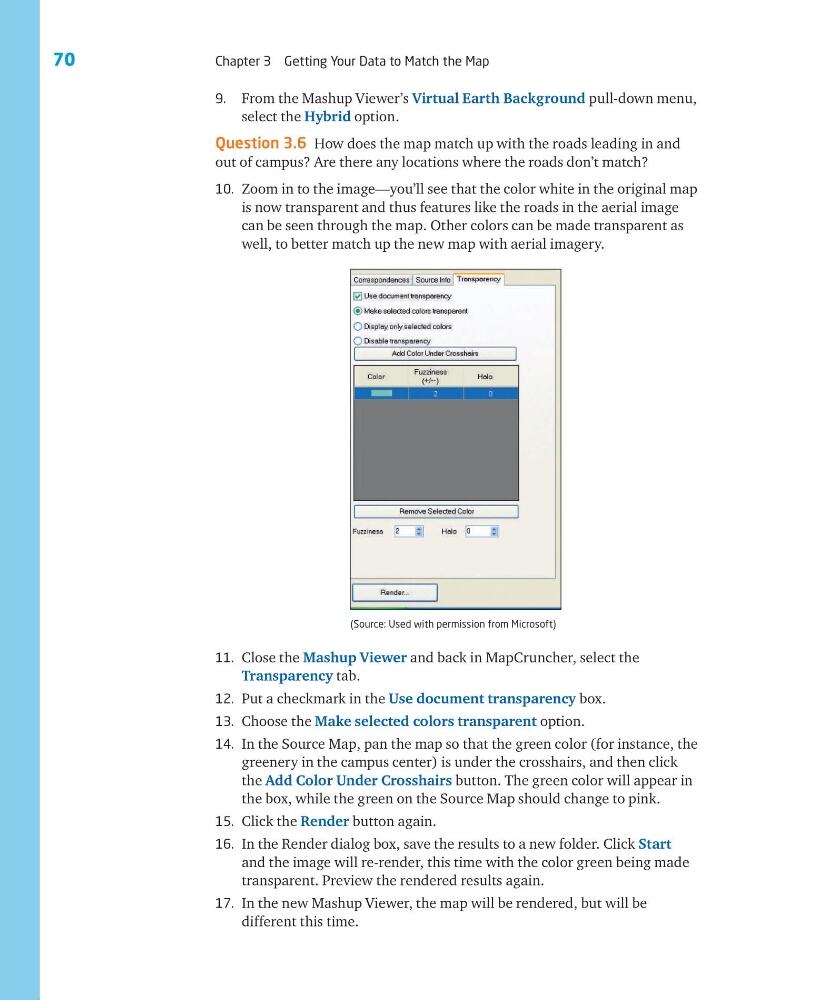
10. Zoom in to the image—you’ll see that the color white in the original map
is now transparent and thus features like the roads in the aerial image
can be seen through the map. Other colors can be made transparent as
well, to better match up the new map with aerial imagery.
(Source: Used with permission from Microsoft)
11. Close the Mashup Viewer and back in MapCruncher, select the
Transparency tab.
12. Put a checkmark in the Use document transparency box.
13. Choose the Make selected colors transparent option.
14. In the Source Map, pan the map so that the green color (for instance, the
greenery in the campus center) is under the crosshairs, and then click
the Add Color Under Crosshairs button. The green color will appear in
the box, while the green on the Source Map should change to pink.
15. Click the Render button again.
16. In the Render dialog box, save the results to a new folder. Click Start
and the image will re-render, this time with the color green being made
transparent. Preview the rendered results again.
17. In the new Mashup Viewer, the map will be rendered, but will be
different this time.
Chapter 3 Getting Your Data to Match the Map
9. From the Mashup Viewer’s Virtual Earth Background pull-down menu,
select the Hybrid option.
Question 3.6 How does the map match up with the roads leading in and
out of campus? Are there any locations where the roads don’t match?
10. Zoom in to the image—you’ll see that the color white in the original map
is now transparent and thus features like the roads in the aerial image
can be seen through the map. Other colors can be made transparent as
well, to better match up the new map with aerial imagery.
(Source: Used with permission from Microsoft)
11. Close the Mashup Viewer and back in MapCruncher, select the
Transparency tab.
12. Put a checkmark in the Use document transparency box.
13. Choose the Make selected colors transparent option.
14. In the Source Map, pan the map so that the green color (for instance, the
greenery in the campus center) is under the crosshairs, and then click
the Add Color Under Crosshairs button. The green color will appear in
the box, while the green on the Source Map should change to pink.
15. Click the Render button again.
16. In the Render dialog box, save the results to a new folder. Click Start
and the image will re-render, this time with the color green being made
transparent. Preview the rendered results again.
17. In the new Mashup Viewer, the map will be rendered, but will be
different this time.