

393
Digital Terrain Analysis
The MICRODEM section of the lab can be performed with a DEM of your
local area. See Hands-on Application 13.4: The National Map Seamless Server
for more information on downloading elevation datasets.
13.1 Examining Landscapes and Terrain
with Google Earth
1. Start Google Earth and for a good example of some variable terrain, “Fly
To” the Grand Canyon. For more information about the Grand Canyon,
check out this Website: http://www.nps.gov/grca/index.htm.
By default, Google Earth’s “Terrain” options will be turned on for you.
2. Also, select the Tools pull-down menu and choose Options. In the
dialog box that appears, click on the Navigation tab, and make sure
the box that says “Automatically tilt when zooming” has its radio button
filled in. This will ensure that Google Earth will zoom in to areas while
tilting to a perspective view.
3. Use the Zoom Slider to tilt the view all the way down that it will go, so
the view looks like you’re standing somewhere in the Grand Canyon (see
Geospatial Lab Application 1.1 for more info on using this tool). Basically,
push the “plus” button on the Zoom Slider as far down as it’ll go and
your view will zoom in and tilt down to “eye level.”
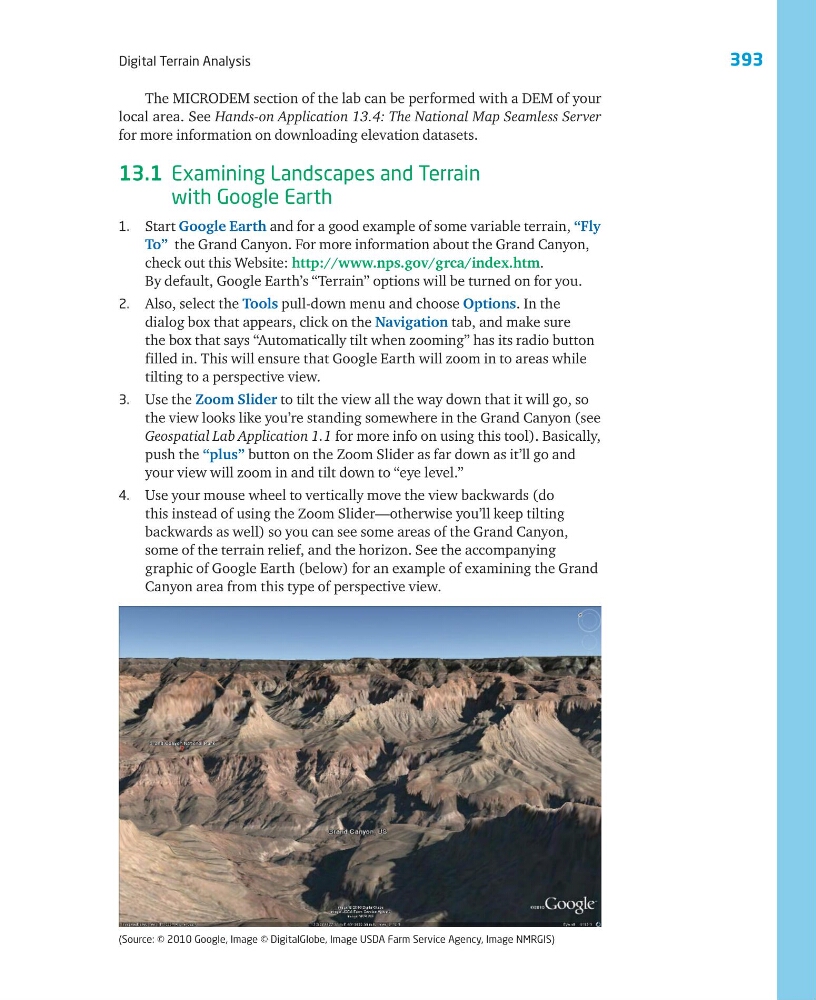
4. Use your mouse wheel to vertically move the view backwards (do
this instead of using the Zoom Slider—otherwise you’ll keep tilting
backwards as well) so you can see some areas of the Grand Canyon,
some of the terrain relief, and the horizon. See the accompanying
graphic of Google Earth (below) for an example of examining the Grand
Canyon area from this type of perspective view.
(Source: © 2010 Google, Image © DigitalGlobe, Image USDA Farm Service Agency, Image NMRGIS)
Digital Terrain Analysis
The MICRODEM section of the lab can be performed with a DEM of your
local area. See Hands-on Application 13.4: The National Map Seamless Server
for more information on downloading elevation datasets.
13.1 Examining Landscapes and Terrain
with Google Earth
1. Start Google Earth and for a good example of some variable terrain, “Fly
To” the Grand Canyon. For more information about the Grand Canyon,
check out this Website: http://www.nps.gov/grca/index.htm.
By default, Google Earth’s “Terrain” options will be turned on for you.
2. Also, select the Tools pull-down menu and choose Options. In the
dialog box that appears, click on the Navigation tab, and make sure
the box that says “Automatically tilt when zooming” has its radio button
filled in. This will ensure that Google Earth will zoom in to areas while
tilting to a perspective view.
3. Use the Zoom Slider to tilt the view all the way down that it will go, so
the view looks like you’re standing somewhere in the Grand Canyon (see
Geospatial Lab Application 1.1 for more info on using this tool). Basically,
push the “plus” button on the Zoom Slider as far down as it’ll go and
your view will zoom in and tilt down to “eye level.”
4. Use your mouse wheel to vertically move the view backwards (do
this instead of using the Zoom Slider—otherwise you’ll keep tilting
backwards as well) so you can see some areas of the Grand Canyon,
some of the terrain relief, and the horizon. See the accompanying
graphic of Google Earth (below) for an example of examining the Grand
Canyon area from this type of perspective view.
(Source: © 2010 Google, Image © DigitalGlobe, Image USDA Farm Service Agency, Image NMRGIS)