

266
Chapter 8 Getting There Quicker with Geospatial Technology
15. Use the same coordinate system as this layer’s source data.
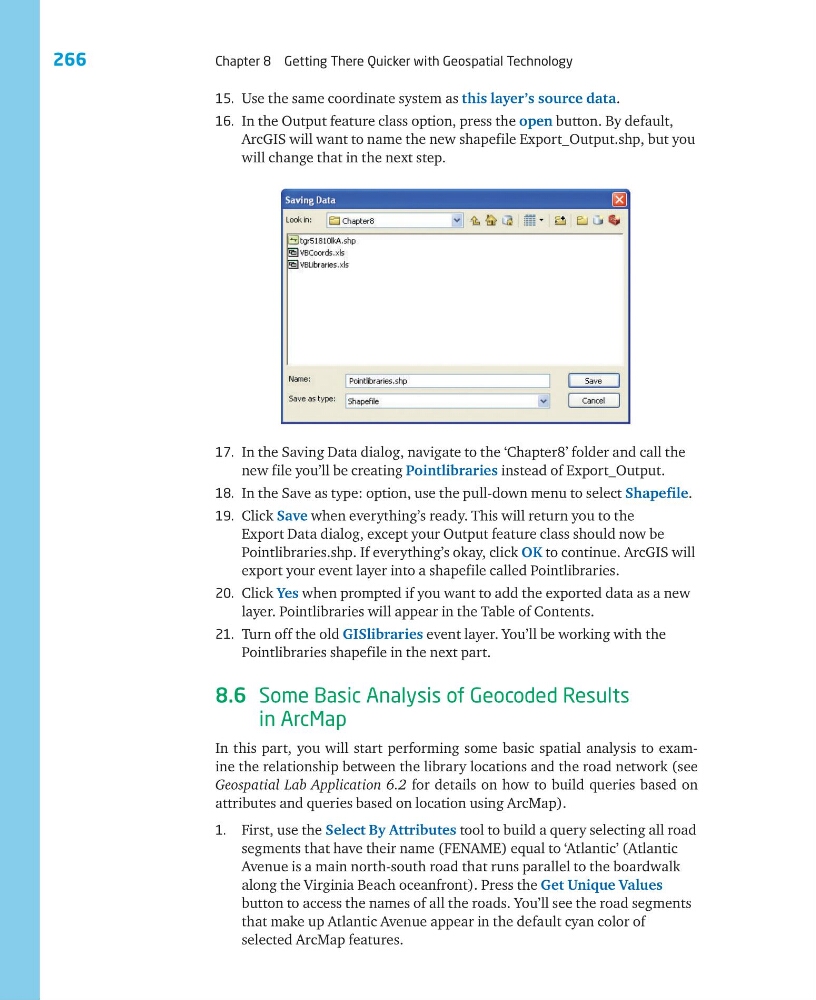
16. In the Output feature class option, press the open button. By default,
ArcGIS will want to name the new shapefile Export_Output.shp, but you
will change that in the next step.
17. In the Saving Data dialog, navigate to the ‘Chapter8’ folder and call the
new file you’ll be creating Pointlibraries instead of Export_Output.
18. In the Save as type: option, use the pull-down menu to select Shapefile.
19. Click Save when everything’s ready. This will return you to the
Export Data dialog, except your Output feature class should now be
Pointlibraries.shp. If everything’s okay, click OK to continue. ArcGIS will
export your event layer into a shapefile called Pointlibraries.
20. Click Yes when prompted if you want to add the exported data as a new
layer. Pointlibraries will appear in the Table of Contents.
21. Turn off the old GISlibraries event layer. You’ll be working with the
Pointlibraries shapefile in the next part.
8.6 Some Basic Analysis of Geocoded Results
in ArcMap
In this part, you will start performing some basic spatial analysis to examine the relationship between the library locations and the road network (see
Geospatial Lab Application 6.2 for details on how to build queries based on
attributes and queries based on location using ArcMap).
1. First, use the Select By Attributes tool to build a query selecting all road
segments that have their name (FENAME) equal to ‘Atlantic’ (Atlantic
Avenue is a main north-south road that runs parallel to the boardwalk
along the Virginia Beach oceanfront). Press the Get Unique Values
button to access the names of all the roads. You’ll see the road segments
that make up Atlantic Avenue appear in the default cyan color of
selected ArcMap features.
Chapter 8 Getting There Quicker with Geospatial Technology
15. Use the same coordinate system as this layer’s source data.
16. In the Output feature class option, press the open button. By default,
ArcGIS will want to name the new shapefile Export_Output.shp, but you
will change that in the next step.
17. In the Saving Data dialog, navigate to the ‘Chapter8’ folder and call the
new file you’ll be creating Pointlibraries instead of Export_Output.
18. In the Save as type: option, use the pull-down menu to select Shapefile.
19. Click Save when everything’s ready. This will return you to the
Export Data dialog, except your Output feature class should now be
Pointlibraries.shp. If everything’s okay, click OK to continue. ArcGIS will
export your event layer into a shapefile called Pointlibraries.
20. Click Yes when prompted if you want to add the exported data as a new
layer. Pointlibraries will appear in the Table of Contents.
21. Turn off the old GISlibraries event layer. You’ll be working with the
Pointlibraries shapefile in the next part.
8.6 Some Basic Analysis of Geocoded Results
in ArcMap
In this part, you will start performing some basic spatial analysis to examine the relationship between the library locations and the road network (see
Geospatial Lab Application 6.2 for details on how to build queries based on
attributes and queries based on location using ArcMap).
1. First, use the Select By Attributes tool to build a query selecting all road
segments that have their name (FENAME) equal to ‘Atlantic’ (Atlantic
Avenue is a main north-south road that runs parallel to the boardwalk
along the Virginia Beach oceanfront). Press the Get Unique Values
button to access the names of all the roads. You’ll see the road segments
that make up Atlantic Avenue appear in the default cyan color of
selected ArcMap features.