

3.10 Compression
Tests on Printed
Tissue
1. Measure the thickness of the printed tissue by a laser measurement system.
2. Compress the tissue to 20% strain at 2 mm/s with a 10 N load
held for 5 min using a mechanical testing machine (Fig. 3).
3. Calculate the Young’s modulus during the initial loading
period (between 15% and 20% strain).
4. Harvest the native cartilage samples from the trochlear groove
of bovine femur condyles and perform compression analysis for
comparison.
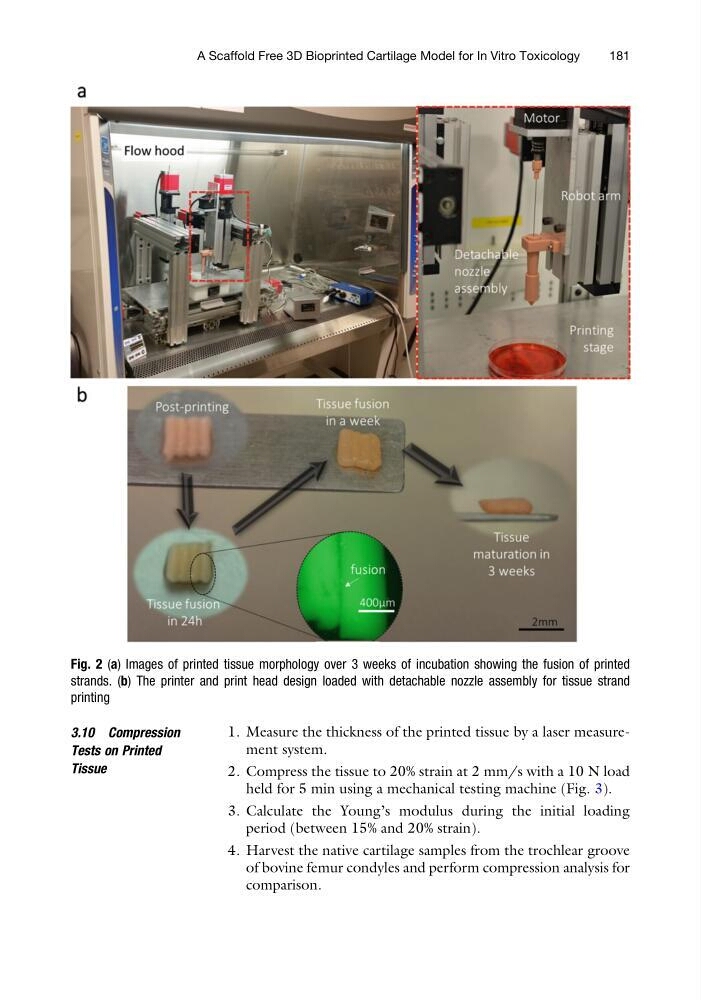
Fig. 2 (a) Images of printed tissue morphology over 3 weeks of incubation showing the fusion of printed
strands. (b) The printer and print head design loaded with detachable nozzle assembly for tissue strand
printing
A Scaffold Free 3D Bioprinted Cartilage Model for In Vitro Toxicology
181
Tests on Printed
Tissue
1. Measure the thickness of the printed tissue by a laser measurement system.
2. Compress the tissue to 20% strain at 2 mm/s with a 10 N load
held for 5 min using a mechanical testing machine (Fig. 3).
3. Calculate the Young’s modulus during the initial loading
period (between 15% and 20% strain).
4. Harvest the native cartilage samples from the trochlear groove
of bovine femur condyles and perform compression analysis for
comparison.
Fig. 2 (a) Images of printed tissue morphology over 3 weeks of incubation showing the fusion of printed
strands. (b) The printer and print head design loaded with detachable nozzle assembly for tissue strand
printing
A Scaffold Free 3D Bioprinted Cartilage Model for In Vitro Toxicology
181