

3. Immediately start a timer set for 3 min (see Note 6). See that
the embryo will slowly move down into the solution (in well 3)
with progression of the incubation time.
4. After 3 min, transfer the embryo to well 4 containing VS2.
Make sure here to place the embryo on the bottom of the dish.
See that the embryo will move upward; then pick it up again
and place it again on the bottom of the dish/within the
medium.
5. With the minimum possible amount of VS2, place the embryo
on the hemistraw. Using the stripper, remove excess media
(i.e., without picking up the embryo) such that the embryo
ends up being in just a “film” of VS2.
6. Plunge the hemistraw in liquid nitrogen. Make sure that not
more than 45 s have passed by from the time point when the
embryo has entered VS2 (i.e., moment of transfer to well 4)
until plunged into liquid nitrogen.
7. Place the hemistraw inside a labeled 0.5 mL straw (see Note 7).
This procedure should be performed under liquid nitrogen.
Seal the straw and store properly in a liquid nitrogen tank.
3.3 Warming
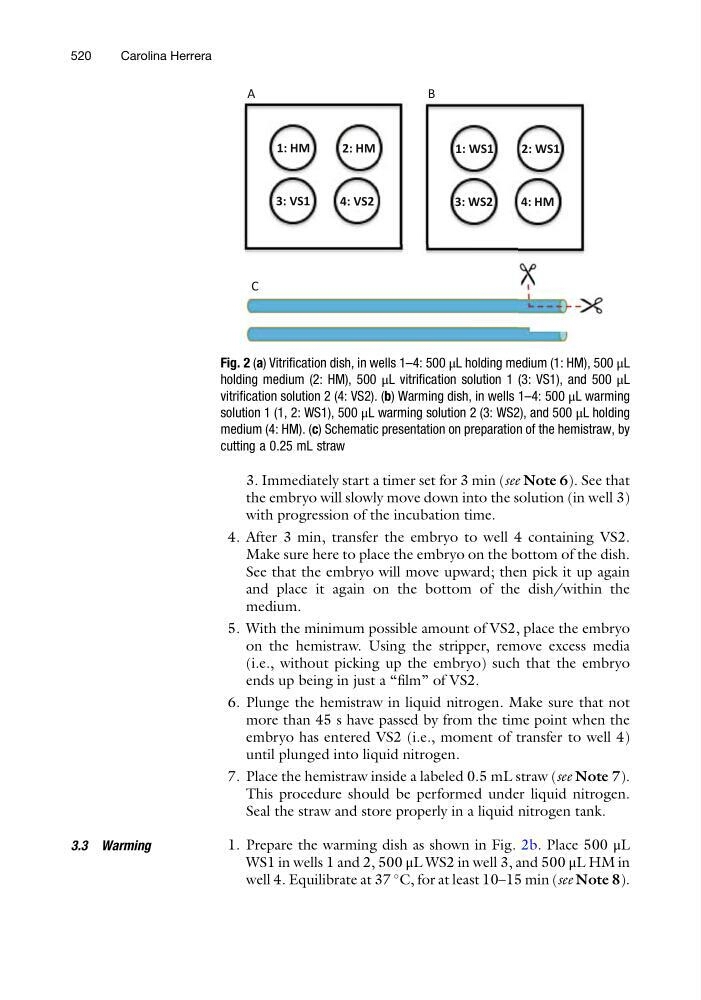
1. Prepare the warming dish as shown in Fig. 2b. Place 500 μL
WS1 in wells 1 and 2, 500 μL WS2 in well 3, and 500 μL HM in
well 4. Equilibrate at 37
C, for at least 10–15 min (see Note 8).
A
B
C
1: HM
2: HM
3: VS1
4: VS2
1: WS1
2: WS1
3: WS2
4: HM
Fig. 2 (a) Vitrification dish, in wells 1–4: 500 μL holding medium (1: HM), 500 μL
holding medium (2: HM), 500 μL vitrification solution 1 (3: VS1), and 500 μL
vitrification solution 2 (4: VS2). (b) Warming dish, in wells 1–4: 500 μL warming
solution 1 (1, 2: WS1), 500 μL warming solution 2 (3: WS2), and 500 μL holding
medium (4: HM). (c) Schematic presentation on preparation of the hemistraw, by
cutting a 0.25 mL straw
520
Carolina Herrera
the embryo will slowly move down into the solution (in well 3)
with progression of the incubation time.
4. After 3 min, transfer the embryo to well 4 containing VS2.
Make sure here to place the embryo on the bottom of the dish.
See that the embryo will move upward; then pick it up again
and place it again on the bottom of the dish/within the
medium.
5. With the minimum possible amount of VS2, place the embryo
on the hemistraw. Using the stripper, remove excess media
(i.e., without picking up the embryo) such that the embryo
ends up being in just a “film” of VS2.
6. Plunge the hemistraw in liquid nitrogen. Make sure that not
more than 45 s have passed by from the time point when the
embryo has entered VS2 (i.e., moment of transfer to well 4)
until plunged into liquid nitrogen.
7. Place the hemistraw inside a labeled 0.5 mL straw (see Note 7).
This procedure should be performed under liquid nitrogen.
Seal the straw and store properly in a liquid nitrogen tank.
3.3 Warming
1. Prepare the warming dish as shown in Fig. 2b. Place 500 μL
WS1 in wells 1 and 2, 500 μL WS2 in well 3, and 500 μL HM in
well 4. Equilibrate at 37
C, for at least 10–15 min (see Note 8).
A
B
C
1: HM
2: HM
3: VS1
4: VS2
1: WS1
2: WS1
3: WS2
4: HM
Fig. 2 (a) Vitrification dish, in wells 1–4: 500 μL holding medium (1: HM), 500 μL
holding medium (2: HM), 500 μL vitrification solution 1 (3: VS1), and 500 μL
vitrification solution 2 (4: VS2). (b) Warming dish, in wells 1–4: 500 μL warming
solution 1 (1, 2: WS1), 500 μL warming solution 2 (3: WS2), and 500 μL holding
medium (4: HM). (c) Schematic presentation on preparation of the hemistraw, by
cutting a 0.25 mL straw
520
Carolina Herrera