

148
10 Photometry
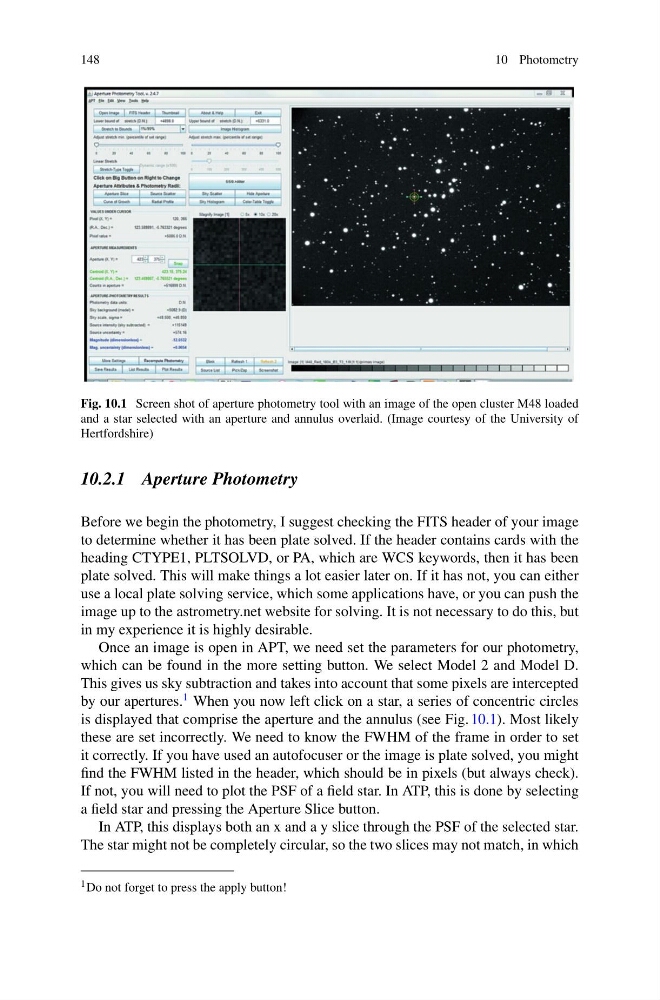
Fig. 10.1 Screen shot of aperture photometry tool with an image of the open cluster M48 loaded
and a star selected with an aperture and annulus overlaid. (Image courtesy of the University of
Hertfordshire)
10.2.1 Aperture Photometry
Before we begin the photometry, I suggest checking the FITS header of your image
to determine whether it has been plate solved. If the header contains cards with the
heading CTYPE1, PLTSOLVD, or PA, which are WCS keywords, then it has been
plate solved. This will make things a lot easier later on. If it has not, you can either
use a local plate solving service, which some applications have, or you can push the
image up to the astrometry.net website for solving. It is not necessary to do this, but
in my experience it is highly desirable.
Once an image is open in APT, we need set the parameters for our photometry,
which can be found in the more setting button. We select Model 2 and Model D.
This gives us sky subtraction and takes into account that some pixels are intercepted
by our apertures.
1 When you now left click on a star, a series of concentric circles
is displayed that comprise the aperture and the annulus (see Fig. 10.1). Most likely
these are set incorrectly. We need to know the FWHM of the frame in order to set
it correctly. If you have used an autofocuser or the image is plate solved, you might
find the FWHM listed in the header, which should be in pixels (but always check).
If not, you will need to plot the PSF of a field star. In ATP, this is done by selecting
a field star and pressing the Aperture Slice button.
In ATP, this displays both an x and a y slice through the PSF of the selected star.
The star might not be completely circular, so the two slices may not match, in which
1 Do not forget to press the apply button!
10 Photometry
Fig. 10.1 Screen shot of aperture photometry tool with an image of the open cluster M48 loaded
and a star selected with an aperture and annulus overlaid. (Image courtesy of the University of
Hertfordshire)
10.2.1 Aperture Photometry
Before we begin the photometry, I suggest checking the FITS header of your image
to determine whether it has been plate solved. If the header contains cards with the
heading CTYPE1, PLTSOLVD, or PA, which are WCS keywords, then it has been
plate solved. This will make things a lot easier later on. If it has not, you can either
use a local plate solving service, which some applications have, or you can push the
image up to the astrometry.net website for solving. It is not necessary to do this, but
in my experience it is highly desirable.
Once an image is open in APT, we need set the parameters for our photometry,
which can be found in the more setting button. We select Model 2 and Model D.
This gives us sky subtraction and takes into account that some pixels are intercepted
by our apertures.
1 When you now left click on a star, a series of concentric circles
is displayed that comprise the aperture and the annulus (see Fig. 10.1). Most likely
these are set incorrectly. We need to know the FWHM of the frame in order to set
it correctly. If you have used an autofocuser or the image is plate solved, you might
find the FWHM listed in the header, which should be in pixels (but always check).
If not, you will need to plot the PSF of a field star. In ATP, this is done by selecting
a field star and pressing the Aperture Slice button.
In ATP, this displays both an x and a y slice through the PSF of the selected star.
The star might not be completely circular, so the two slices may not match, in which
1 Do not forget to press the apply button!