

2. Stratify the seeds by incubating for 2 days at 4
C in darkness in
1.5 mL tubes.
3. Pour MS medium into a square petri dish.
4. When solidified, plate the seeds.
5. Seal the plate with adhesive tape.
6. Grow the seedlings in the growth chamber in vertically oriented positions for 1 week (or more) (see Note 7).
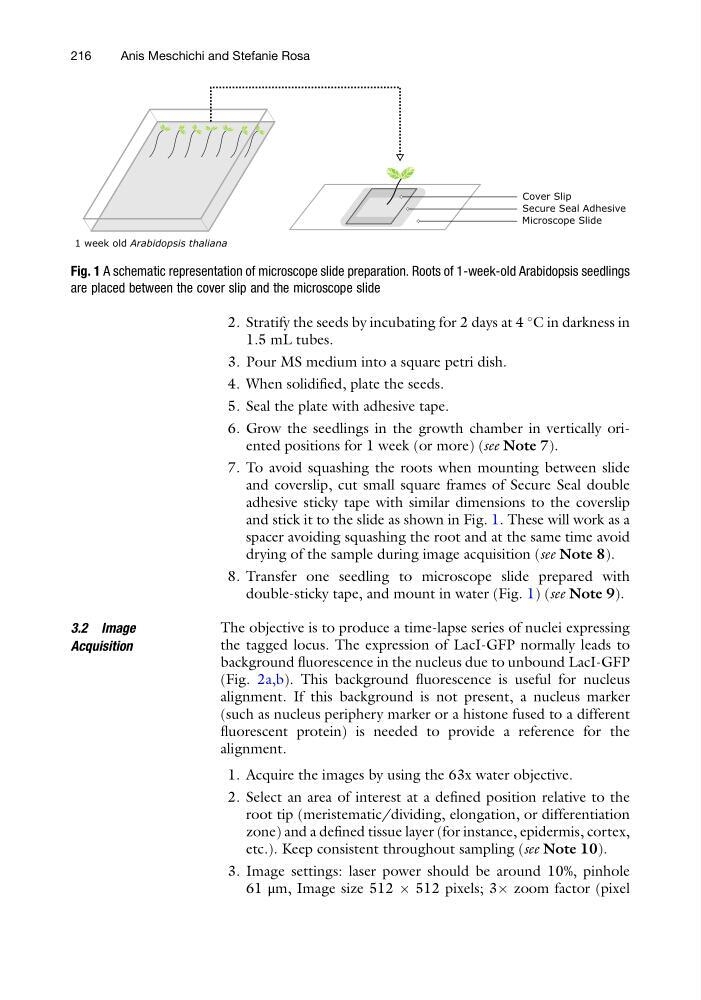
7. To avoid squashing the roots when mounting between slide
and coverslip, cut small square frames of Secure Seal double
adhesive sticky tape with similar dimensions to the coverslip
and stick it to the slide as shown in Fig. 1. These will work as a
spacer avoiding squashing the root and at the same time avoid
drying of the sample during image acquisition (see Note 8).
8. Transfer one seedling to microscope slide prepared with
double-sticky tape, and mount in water (Fig. 1) (see Note 9).
3.2 Image
Acquisition
The objective is to produce a time-lapse series of nuclei expressing
the tagged locus. The expression of LacI-GFP normally leads to
background fluorescence in the nucleus due to unbound LacI-GFP
(Fig. 2a,b). This background fluorescence is useful for nucleus
alignment. If this background is not present, a nucleus marker
(such as nucleus periphery marker or a histone fused to a different
fluorescent protein) is needed to provide a reference for the
alignment.
1. Acquire the images by using the 63x water objective.
2. Select an area of interest at a defined position relative to the
root tip (meristematic/dividing, elongation, or differentiation
zone) and a defined tissue layer (for instance, epidermis, cortex,
etc.). Keep consistent throughout sampling (see Note 10).
3. Image settings: laser power should be around 10%, pinhole
61 μm, Image size 512 Â 512 pixels; 3Â zoom factor (pixel
Cover Slip
Secure Seal Adhesive
Microscope Slide
1 week old Arabidopsis thaliana
Fig. 1 A schematic representation of microscope slide preparation. Roots of 1-week-old Arabidopsis seedlings
are placed between the cover slip and the microscope slide
216
Anis Meschichi and Stefanie Rosa
C in darkness in
1.5 mL tubes.
3. Pour MS medium into a square petri dish.
4. When solidified, plate the seeds.
5. Seal the plate with adhesive tape.
6. Grow the seedlings in the growth chamber in vertically oriented positions for 1 week (or more) (see Note 7).
7. To avoid squashing the roots when mounting between slide
and coverslip, cut small square frames of Secure Seal double
adhesive sticky tape with similar dimensions to the coverslip
and stick it to the slide as shown in Fig. 1. These will work as a
spacer avoiding squashing the root and at the same time avoid
drying of the sample during image acquisition (see Note 8).
8. Transfer one seedling to microscope slide prepared with
double-sticky tape, and mount in water (Fig. 1) (see Note 9).
3.2 Image
Acquisition
The objective is to produce a time-lapse series of nuclei expressing
the tagged locus. The expression of LacI-GFP normally leads to
background fluorescence in the nucleus due to unbound LacI-GFP
(Fig. 2a,b). This background fluorescence is useful for nucleus
alignment. If this background is not present, a nucleus marker
(such as nucleus periphery marker or a histone fused to a different
fluorescent protein) is needed to provide a reference for the
alignment.
1. Acquire the images by using the 63x water objective.
2. Select an area of interest at a defined position relative to the
root tip (meristematic/dividing, elongation, or differentiation
zone) and a defined tissue layer (for instance, epidermis, cortex,
etc.). Keep consistent throughout sampling (see Note 10).
3. Image settings: laser power should be around 10%, pinhole
61 μm, Image size 512 Â 512 pixels; 3Â zoom factor (pixel
Cover Slip
Secure Seal Adhesive
Microscope Slide
1 week old Arabidopsis thaliana
Fig. 1 A schematic representation of microscope slide preparation. Roots of 1-week-old Arabidopsis seedlings
are placed between the cover slip and the microscope slide
216
Anis Meschichi and Stefanie Rosa