

of Orientation/ventilation/illumination requirements, clear
entrances and exits, clear lines of site to and from the project,
clear horizontal and vertical circulation, a clear project image
(Edges/Zones/Paths/Nodes/Landmarks), clear style and a
valid structural system.
The process is iterative, with return to previous steps as
often as needed whenever a change or lack of study of an
element requires a revision to retrace the steps then follow
the path again.
5 Case Studies: The Process in Practice
The process has been tested in five different design studios in
two separate private sector universities in Egypt in Spring
and Fall semesters of 2016 and 2017 for second- and
third-year architectural design students. In both universities,
class sizes averaged 30–45 students, with one or two professors and 2–4 teaching assistants. Also, in both universities, the students were taught in previous design courses
using the following methodology: site analysis, standards,
zoning, then the first sketch plan, with a weekly session
where student submissions are critiqued with a professor or a
teaching assistant. A final jury, usually with the participation
of external jurors finally evaluates the projects at the end of
the semester. This roughly summarizes the “studio culture”
of both universities. The studio topics varied: elementary
school, mixed-use complex (5-star hotel, mall and office
building) and three variations on an Islamic centre (central
mosque plus different facilities). For those studios, the proposed “10-step process” was explained, then enforced with
each week the students being graded on the work submitted
according to the process steps, which the students were
required to pass through in weekly stages, reaching a line
diagram by week 5 of the semester, with weeks 5–9 for
design development, week 10 for the final sketch and final
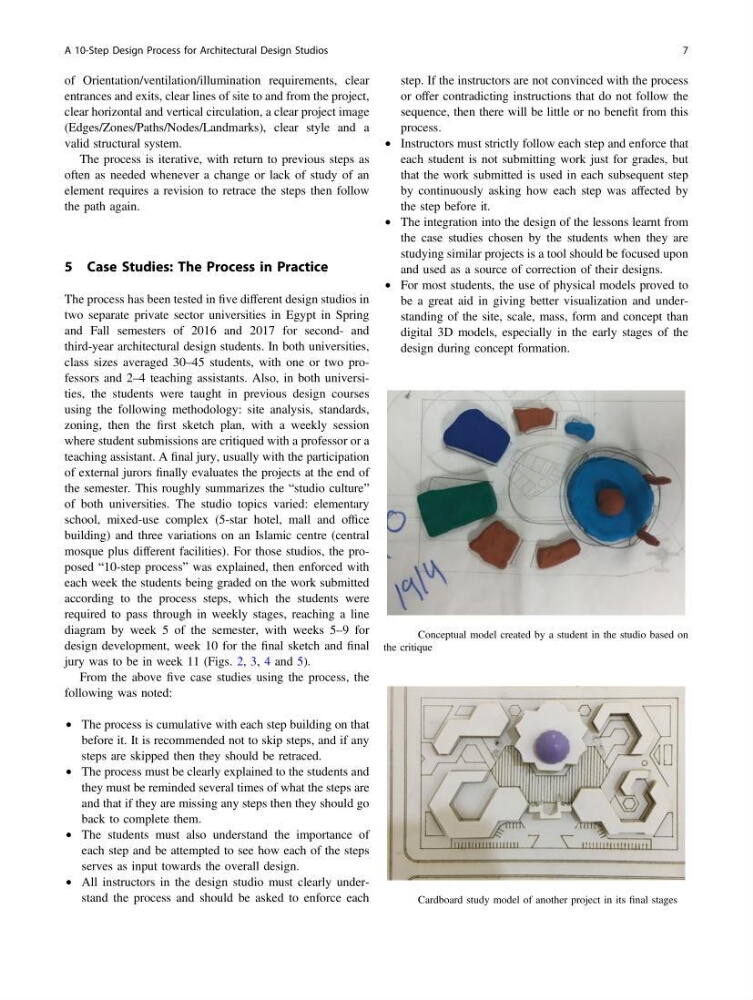
jury was to be in week 11 (Figs. 2, 3, 4 and 5).
From the above five case studies using the process, the
following was noted:
• The process is cumulative with each step building on that
before it. It is recommended not to skip steps, and if any
steps are skipped then they should be retraced.
• The process must be clearly explained to the students and
they must be reminded several times of what the steps are
and that if they are missing any steps then they should go
back to complete them.
• The students must also understand the importance of
each step and be attempted to see how each of the steps
serves as input towards the overall design.
• All instructors in the design studio must clearly understand the process and should be asked to enforce each
step. If the instructors are not convinced with the process
or offer contradicting instructions that do not follow the
sequence, then there will be little or no benefit from this
process.
• Instructors must strictly follow each step and enforce that
each student is not submitting work just for grades, but
that the work submitted is used in each subsequent step
by continuously asking how each step was affected by
the step before it.
• The integration into the design of the lessons learnt from
the case studies chosen by the students when they are
studying similar projects is a tool should be focused upon
and used as a source of correction of their designs.
• For most students, the use of physical models proved to
be a great aid in giving better visualization and understanding of the site, scale, mass, form and concept than
digital 3D models, especially in the early stages of the
design during concept formation.
Fig. 2 Conceptual model created by a student in the studio based on
the critique
Fig. 3 Cardboard study model of another project in its final stages
A 10-Step Design Process for Architectural Design Studios
7
entrances and exits, clear lines of site to and from the project,
clear horizontal and vertical circulation, a clear project image
(Edges/Zones/Paths/Nodes/Landmarks), clear style and a
valid structural system.
The process is iterative, with return to previous steps as
often as needed whenever a change or lack of study of an
element requires a revision to retrace the steps then follow
the path again.
5 Case Studies: The Process in Practice
The process has been tested in five different design studios in
two separate private sector universities in Egypt in Spring
and Fall semesters of 2016 and 2017 for second- and
third-year architectural design students. In both universities,
class sizes averaged 30–45 students, with one or two professors and 2–4 teaching assistants. Also, in both universities, the students were taught in previous design courses
using the following methodology: site analysis, standards,
zoning, then the first sketch plan, with a weekly session
where student submissions are critiqued with a professor or a
teaching assistant. A final jury, usually with the participation
of external jurors finally evaluates the projects at the end of
the semester. This roughly summarizes the “studio culture”
of both universities. The studio topics varied: elementary
school, mixed-use complex (5-star hotel, mall and office
building) and three variations on an Islamic centre (central
mosque plus different facilities). For those studios, the proposed “10-step process” was explained, then enforced with
each week the students being graded on the work submitted
according to the process steps, which the students were
required to pass through in weekly stages, reaching a line
diagram by week 5 of the semester, with weeks 5–9 for
design development, week 10 for the final sketch and final
jury was to be in week 11 (Figs. 2, 3, 4 and 5).
From the above five case studies using the process, the
following was noted:
• The process is cumulative with each step building on that
before it. It is recommended not to skip steps, and if any
steps are skipped then they should be retraced.
• The process must be clearly explained to the students and
they must be reminded several times of what the steps are
and that if they are missing any steps then they should go
back to complete them.
• The students must also understand the importance of
each step and be attempted to see how each of the steps
serves as input towards the overall design.
• All instructors in the design studio must clearly understand the process and should be asked to enforce each
step. If the instructors are not convinced with the process
or offer contradicting instructions that do not follow the
sequence, then there will be little or no benefit from this
process.
• Instructors must strictly follow each step and enforce that
each student is not submitting work just for grades, but
that the work submitted is used in each subsequent step
by continuously asking how each step was affected by
the step before it.
• The integration into the design of the lessons learnt from
the case studies chosen by the students when they are
studying similar projects is a tool should be focused upon
and used as a source of correction of their designs.
• For most students, the use of physical models proved to
be a great aid in giving better visualization and understanding of the site, scale, mass, form and concept than
digital 3D models, especially in the early stages of the
design during concept formation.
Fig. 2 Conceptual model created by a student in the studio based on
the critique
Fig. 3 Cardboard study model of another project in its final stages
A 10-Step Design Process for Architectural Design Studios
7