

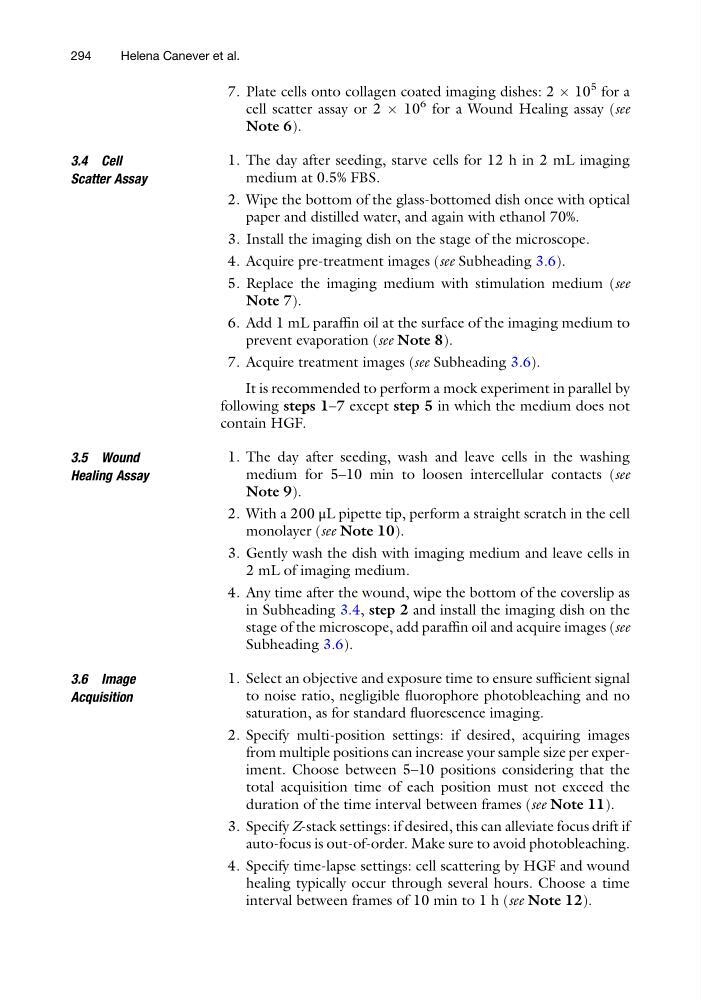
7. Plate cells onto collagen coated imaging dishes: 2 Â 10
5 for a
cell scatter assay or 2 Â 10
6 for a Wound Healing assay (see
Note 6).
3.4 Cell
Scatter Assay
1. The day after seeding, starve cells for 12 h in 2 mL imaging
medium at 0.5% FBS.
2. Wipe the bottom of the glass-bottomed dish once with optical
paper and distilled water, and again with ethanol 70%.
3. Install the imaging dish on the stage of the microscope.
4. Acquire pre-treatment images (see Subheading 3.6).
5. Replace the imaging medium with stimulation medium (see
Note 7).
6. Add 1 mL paraffin oil at the surface of the imaging medium to
prevent evaporation (see Note 8).
7. Acquire treatment images (see Subheading 3.6).
It is recommended to perform a mock experiment in parallel by
following steps 1–7 except step 5 in which the medium does not
contain HGF.
3.5 Wound
Healing Assay
1. The day after seeding, wash and leave cells in the washing
medium for 5–10 min to loosen intercellular contacts (see
Note 9).
2. With a 200 μL pipette tip, perform a straight scratch in the cell
monolayer (see Note 10).
3. Gently wash the dish with imaging medium and leave cells in
2 mL of imaging medium.
4. Any time after the wound, wipe the bottom of the coverslip as
in Subheading 3.4, step 2 and install the imaging dish on the
stage of the microscope, add paraffin oil and acquire images (see
Subheading 3.6).
3.6 Image
Acquisition
1. Select an objective and exposure time to ensure sufficient signal
to noise ratio, negligible fluorophore photobleaching and no
saturation, as for standard fluorescence imaging.
2. Specify multi-position settings: if desired, acquiring images
from multiple positions can increase your sample size per experiment. Choose between 5–10 positions considering that the
total acquisition time of each position must not exceed the
duration of the time interval between frames (see Note 11).
3. Specify Z-stack settings: if desired, this can alleviate focus drift if
auto-focus is out-of-order. Make sure to avoid photobleaching.
4. Specify time-lapse settings: cell scattering by HGF and wound
healing typically occur through several hours. Choose a time
interval between frames of 10 min to 1 h (see Note 12).
294
Helena Canever et al.
5 for a
cell scatter assay or 2 Â 10
6 for a Wound Healing assay (see
Note 6).
3.4 Cell
Scatter Assay
1. The day after seeding, starve cells for 12 h in 2 mL imaging
medium at 0.5% FBS.
2. Wipe the bottom of the glass-bottomed dish once with optical
paper and distilled water, and again with ethanol 70%.
3. Install the imaging dish on the stage of the microscope.
4. Acquire pre-treatment images (see Subheading 3.6).
5. Replace the imaging medium with stimulation medium (see
Note 7).
6. Add 1 mL paraffin oil at the surface of the imaging medium to
prevent evaporation (see Note 8).
7. Acquire treatment images (see Subheading 3.6).
It is recommended to perform a mock experiment in parallel by
following steps 1–7 except step 5 in which the medium does not
contain HGF.
3.5 Wound
Healing Assay
1. The day after seeding, wash and leave cells in the washing
medium for 5–10 min to loosen intercellular contacts (see
Note 9).
2. With a 200 μL pipette tip, perform a straight scratch in the cell
monolayer (see Note 10).
3. Gently wash the dish with imaging medium and leave cells in
2 mL of imaging medium.
4. Any time after the wound, wipe the bottom of the coverslip as
in Subheading 3.4, step 2 and install the imaging dish on the
stage of the microscope, add paraffin oil and acquire images (see
Subheading 3.6).
3.6 Image
Acquisition
1. Select an objective and exposure time to ensure sufficient signal
to noise ratio, negligible fluorophore photobleaching and no
saturation, as for standard fluorescence imaging.
2. Specify multi-position settings: if desired, acquiring images
from multiple positions can increase your sample size per experiment. Choose between 5–10 positions considering that the
total acquisition time of each position must not exceed the
duration of the time interval between frames (see Note 11).
3. Specify Z-stack settings: if desired, this can alleviate focus drift if
auto-focus is out-of-order. Make sure to avoid photobleaching.
4. Specify time-lapse settings: cell scattering by HGF and wound
healing typically occur through several hours. Choose a time
interval between frames of 10 min to 1 h (see Note 12).
294
Helena Canever et al.