

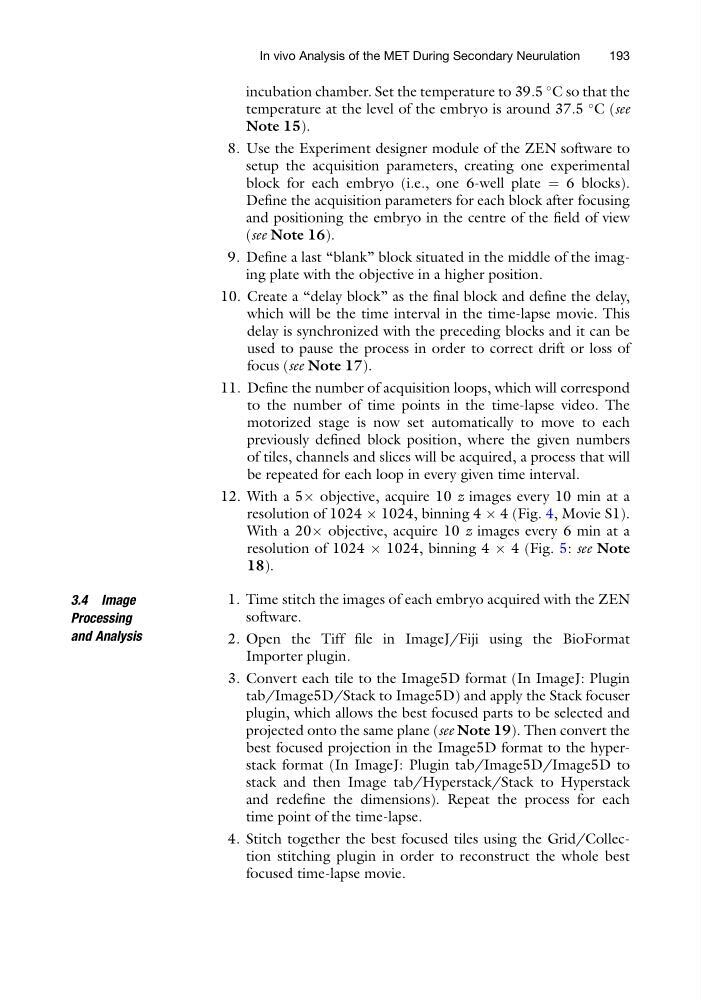
incubation chamber. Set the temperature to 39.5
C so that the
temperature at the level of the embryo is around 37.5
C (see
Note 15).
8. Use the Experiment designer module of the ZEN software to
setup the acquisition parameters, creating one experimental
block for each embryo (i.e., one 6-well plate ¼ 6 blocks).
Define the acquisition parameters for each block after focusing
and positioning the embryo in the centre of the field of view
(see Note 16).
9. Define a last “blank” block situated in the middle of the imaging plate with the objective in a higher position.
10. Create a “delay block” as the final block and define the delay,
which will be the time interval in the time-lapse movie. This
delay is synchronized with the preceding blocks and it can be
used to pause the process in order to correct drift or loss of
focus (see Note 17).
11. Define the number of acquisition loops, which will correspond
to the number of time points in the time-lapse video. The
motorized stage is now set automatically to move to each
previously defined block position, where the given numbers
of tiles, channels and slices will be acquired, a process that will
be repeated for each loop in every given time interval.
12. With a 5Â objective, acquire 10 z images every 10 min at a
resolution of 1024 Â 1024, binning 4 Â 4 (Fig. 4, Movie S1).
With a 20Â objective, acquire 10 z images every 6 min at a
resolution of 1024 Â 1024, binning 4 Â 4 (Fig. 5: see Note
18).
3.4 Image
Processing
and Analysis
1. Time stitch the images of each embryo acquired with the ZEN
software.
2. Open the Tiff file in ImageJ/Fiji using the BioFormat
Importer plugin.
3. Convert each tile to the Image5D format (In ImageJ: Plugin
tab/Image5D/Stack to Image5D) and apply the Stack focuser
plugin, which allows the best focused parts to be selected and
projected onto the same plane (see Note 19). Then convert the
best focused projection in the Image5D format to the hyperstack format (In ImageJ: Plugin tab/Image5D/Image5D to
stack and then Image tab/Hyperstack/Stack to Hyperstack
and redefine the dimensions). Repeat the process for each
time point of the time-lapse.
4. Stitch together the best focused tiles using the Grid/Collection stitching plugin in order to reconstruct the whole best
focused time-lapse movie.
In vivo Analysis of the MET During Secondary Neurulation
193
C so that the
temperature at the level of the embryo is around 37.5
C (see
Note 15).
8. Use the Experiment designer module of the ZEN software to
setup the acquisition parameters, creating one experimental
block for each embryo (i.e., one 6-well plate ¼ 6 blocks).
Define the acquisition parameters for each block after focusing
and positioning the embryo in the centre of the field of view
(see Note 16).
9. Define a last “blank” block situated in the middle of the imaging plate with the objective in a higher position.
10. Create a “delay block” as the final block and define the delay,
which will be the time interval in the time-lapse movie. This
delay is synchronized with the preceding blocks and it can be
used to pause the process in order to correct drift or loss of
focus (see Note 17).
11. Define the number of acquisition loops, which will correspond
to the number of time points in the time-lapse video. The
motorized stage is now set automatically to move to each
previously defined block position, where the given numbers
of tiles, channels and slices will be acquired, a process that will
be repeated for each loop in every given time interval.
12. With a 5Â objective, acquire 10 z images every 10 min at a
resolution of 1024 Â 1024, binning 4 Â 4 (Fig. 4, Movie S1).
With a 20Â objective, acquire 10 z images every 6 min at a
resolution of 1024 Â 1024, binning 4 Â 4 (Fig. 5: see Note
18).
3.4 Image
Processing
and Analysis
1. Time stitch the images of each embryo acquired with the ZEN
software.
2. Open the Tiff file in ImageJ/Fiji using the BioFormat
Importer plugin.
3. Convert each tile to the Image5D format (In ImageJ: Plugin
tab/Image5D/Stack to Image5D) and apply the Stack focuser
plugin, which allows the best focused parts to be selected and
projected onto the same plane (see Note 19). Then convert the
best focused projection in the Image5D format to the hyperstack format (In ImageJ: Plugin tab/Image5D/Image5D to
stack and then Image tab/Hyperstack/Stack to Hyperstack
and redefine the dimensions). Repeat the process for each
time point of the time-lapse.
4. Stitch together the best focused tiles using the Grid/Collection stitching plugin in order to reconstruct the whole best
focused time-lapse movie.
In vivo Analysis of the MET During Secondary Neurulation
193