

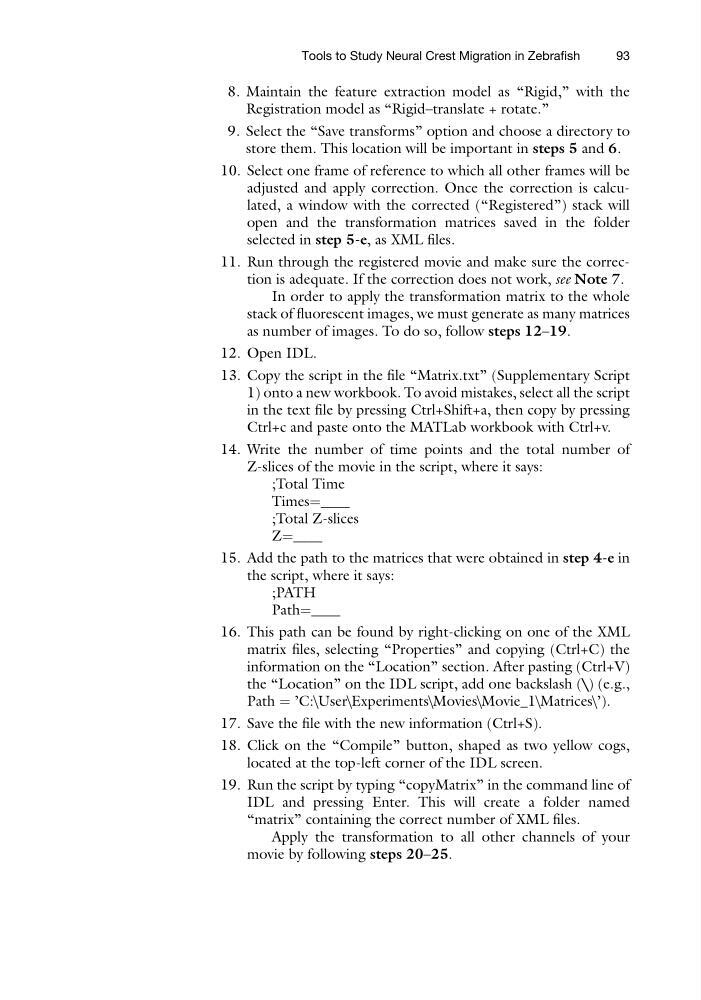
8. Maintain the feature extraction model as “Rigid,” with the
Registration model as “Rigid–translate + rotate.”
9. Select the “Save transforms” option and choose a directory to
store them. This location will be important in steps 5 and 6.
10. Select one frame of reference to which all other frames will be
adjusted and apply correction. Once the correction is calculated, a window with the corrected (“Registered”) stack will
open and the transformation matrices saved in the folder
selected in step 5-e, as XML files.
11. Run through the registered movie and make sure the correction is adequate. If the correction does not work, see Note 7.
In order to apply the transformation matrix to the whole
stack of fluorescent images, we must generate as many matrices
as number of images. To do so, follow steps 12–19.
12. Open IDL.
13. Copy the script in the file “Matrix.txt” (Supplementary Script
1) onto a new workbook. To avoid mistakes, select all the script
in the text file by pressing Ctrl+Shift+a, then copy by pressing
Ctrl+c and paste onto the MATLab workbook with Ctrl+v.
14. Write the number of time points and the total number of
Z-slices of the movie in the script, where it says:
;Total Time
Times¼____
;Total Z-slices
Z¼____
15. Add the path to the matrices that were obtained in step 4-e in
the script, where it says:
;PATH
Path¼____
16. This path can be found by right-clicking on one of the XML
matrix files, selecting “Properties” and copying (Ctrl+C) the
information on the “Location” section. After pasting (Ctrl+V)
the “Location” on the IDL script, add one backslash (\) (e.g.,
Path ¼ ’C:\User\Experiments\Movies\Movie_1\Matrices\’).
17. Save the file with the new information (Ctrl+S).
18. Click on the “Compile” button, shaped as two yellow cogs,
located at the top-left corner of the IDL screen.
19. Run the script by typing “copyMatrix” in the command line of
IDL and pressing Enter. This will create a folder named
“matrix” containing the correct number of XML files.
Apply the transformation to all other channels of your
movie by following steps 20–25.
Tools to Study Neural Crest Migration in Zebrafish
93
Registration model as “Rigid–translate + rotate.”
9. Select the “Save transforms” option and choose a directory to
store them. This location will be important in steps 5 and 6.
10. Select one frame of reference to which all other frames will be
adjusted and apply correction. Once the correction is calculated, a window with the corrected (“Registered”) stack will
open and the transformation matrices saved in the folder
selected in step 5-e, as XML files.
11. Run through the registered movie and make sure the correction is adequate. If the correction does not work, see Note 7.
In order to apply the transformation matrix to the whole
stack of fluorescent images, we must generate as many matrices
as number of images. To do so, follow steps 12–19.
12. Open IDL.
13. Copy the script in the file “Matrix.txt” (Supplementary Script
1) onto a new workbook. To avoid mistakes, select all the script
in the text file by pressing Ctrl+Shift+a, then copy by pressing
Ctrl+c and paste onto the MATLab workbook with Ctrl+v.
14. Write the number of time points and the total number of
Z-slices of the movie in the script, where it says:
;Total Time
Times¼____
;Total Z-slices
Z¼____
15. Add the path to the matrices that were obtained in step 4-e in
the script, where it says:
;PATH
Path¼____
16. This path can be found by right-clicking on one of the XML
matrix files, selecting “Properties” and copying (Ctrl+C) the
information on the “Location” section. After pasting (Ctrl+V)
the “Location” on the IDL script, add one backslash (\) (e.g.,
Path ¼ ’C:\User\Experiments\Movies\Movie_1\Matrices\’).
17. Save the file with the new information (Ctrl+S).
18. Click on the “Compile” button, shaped as two yellow cogs,
located at the top-left corner of the IDL screen.
19. Run the script by typing “copyMatrix” in the command line of
IDL and pressing Enter. This will create a folder named
“matrix” containing the correct number of XML files.
Apply the transformation to all other channels of your
movie by following steps 20–25.
Tools to Study Neural Crest Migration in Zebrafish
93